Softie Emergency Parachutes


Para-Phernalia, Inc., 19018 59th Dr. NE, Unit #2, Arlington, WA 98223, United States (US)
Para-Phernalia, Inc. has designed and manufactured the Softie line of pilot emergency parachutes since 1979. Our emergency parachutes are known world wide for being the highest quality, most comfortable, and reliable emergency parachutes available.
Services
There is no question that a parachute can save your life during an emergency bailout situation. Before you strap on that life-saving device you need to familiarize yourself with your parachute system. Educate yourself and choose wisely. We’re here to help!
Parachute system components
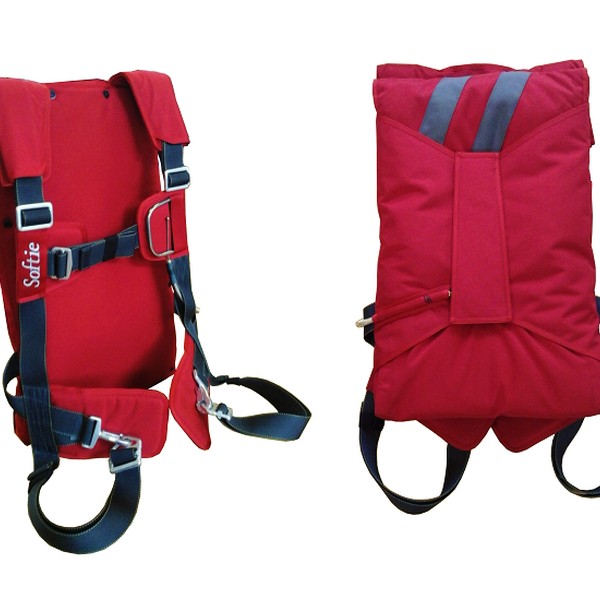
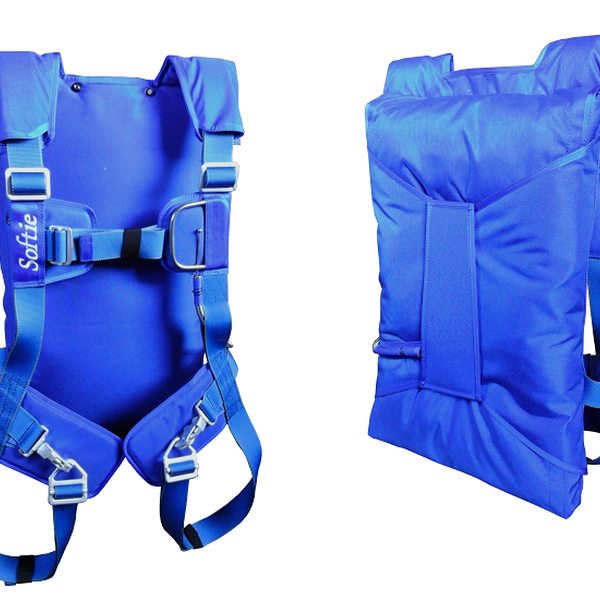
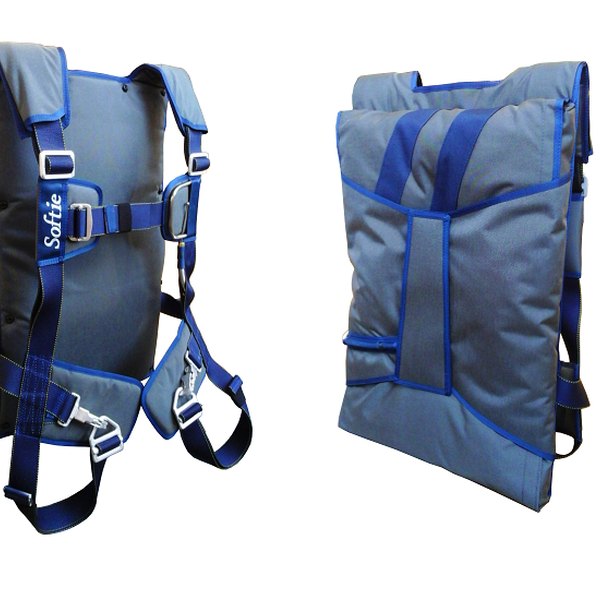
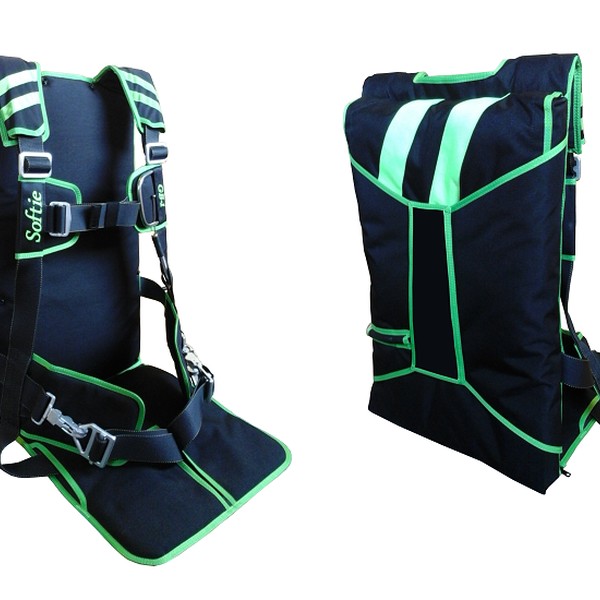
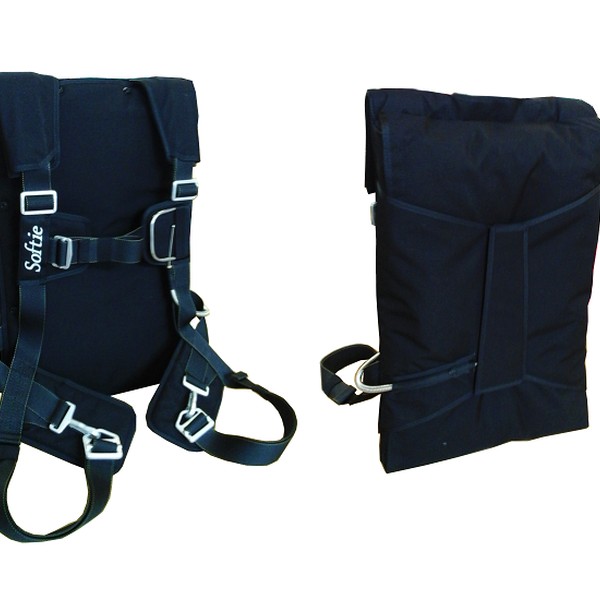
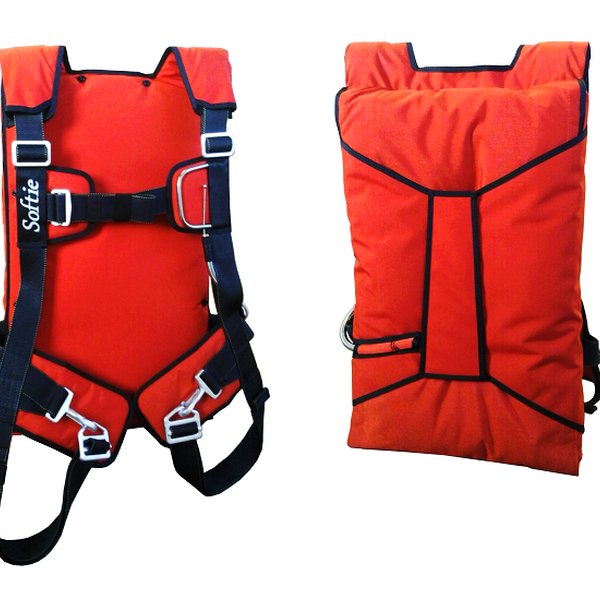
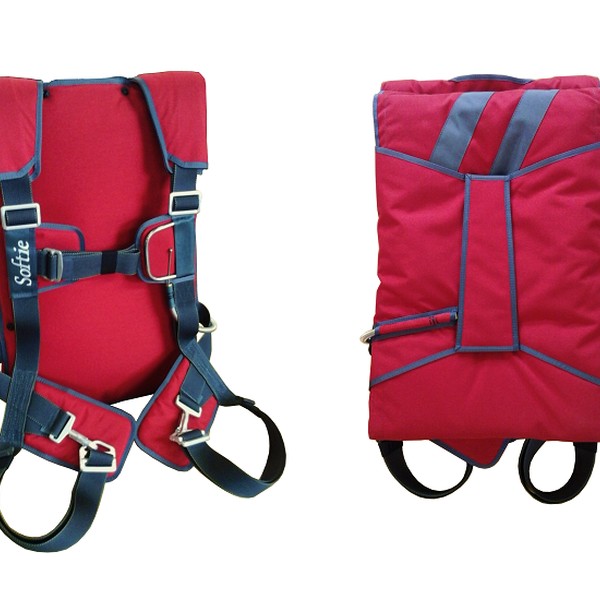
There are three major components to an emergency parachute system: the parachute canopy, the harness which attaches you to the parachute canopy and the container that holds the parachute canopy when it is packed. The parachute harness and container are collectively called the ‘harness and container system’ and may be manufactured by a different company from that of the parachute canopy. The pilot chute is also an important component.
Parachute systems have specific limitations; do not to exceed them
It is imperative (absolutely mandatory) that you choose a parachute canopy that is designed to carry your weight, plus the weight of whatever you might be carrying along. Using a parachute that is not compatible with your weight can result in serious injury. Softie Parachute Systems have a weight limit of 180 lb, 240 lb or 275 lb, depending on the model. The weight and deployment speed limitations of the parachute canopy can be located on the data panel attached to the parachute canopy. The fit of the parachute system is an important consideration as well.
How to maintain and store your parachute system
The longevity of your parachute is your responsibility and is almost entirely dependent on proper maintenance and storage. When not in use, store the parachute in a bag in a well-ventilated area away from direct exposure to sunlight, oils, and/or acids. If you find that your parachute has come in contact with any unsafe conditions including wetness, have it inspected by a good rigger immediately.
Parachute Riggers
Get to know your parachute rigger. If you do not have a local rigger get referrals from a fellow pilot or the manufacturer of your parachute system. Make sure that the rigger is familiar with your parachute system and has the proper packing instructions and manual before having it repacked. At the time of the repack ask your rigger to go over your parachute with you. Put it on and pull the ripcord. This will assure your awareness of the force it requires. (A 22 lb pull is the maximum that the TSO allows.)
Preflight Inspection
Establish a preflight routine of inspecting your parachute. The condition of the parachute can be directly related to your safety. A small oversight could create a safety hazard. Check the fabric for stains, wear and mildew. Inspect the hardware; be sure snaps function properly and check for corrosion. Look for fraying or nicks in the webbing. Inspect for broken or missing stitches. Perform a pin check on the ripcord by lifting the pin protector flap and making sure the pins are straight and extend through the closing loop at least 0.5″. Make sure that the handle extracts from the pocket easily. There should be no kinks or dents in the ripcord housing. Finally inspect the packing data card. Check the last date of inspection and repack. In the USA, FAA regulations (14 CFR 91.307New Tab) require an emergency parachute in use to be inspected and packed by a licensed rigger within the last 180 days, or up to 1 year in countries that do not have a requirement. This preflight routine is mandatory to maintain the safety of your parachute.
Emergency Procedures
An emergency is not a good time to start thinking about emergency procedures. Plan in advance and know the three most important variables in the decision to leave your aircraft: attitude, altitude, and airspeed.
Attitude, both the attitude of your aircraft and your personal attitude, can effect your egress. A tumbling aircraft can be almost impossible to exit. An ‘I-will-survive’ attitude is significantly more effective at attaining that survival than other less positive attitudes. Altitude is important because a higher altitude means a better chance of having a fully deployed parachute before impact. A general rule of thumb is: if you have pack opening above 1000 ft. AGL, you will have a fully deployed parachute before hitting the ground. Airspeed will also determine your exit. 100 MPH is ideal for a fast opening parachute, however if you can trade off airspeed for altitude do so.
The primary causes of most unsuccessful bailouts are not being prepared and waiting too long to make the decision to bailout. Using your parachute is most obviously your last option. Be familiar with your particular aircraft escape procedures and practice them often until they are second nature. You must be able to react instantly to save valuable time, altitude, and your life. If you don’t have an emergency egress procedure for your aircraft the best time to develop one is before your next flight.
Once you have exited the aircraft, you will most likely be tumbling. The most important thing to do is pull the ripcord immediately. It takes approximately 2-3 seconds for the parachute to fully deploy. Altitude used for complete deployment at terminal velocity is approximately 300-500 ft. That is not the altitude to initiate emergency procedures.
Once the parachute is open, it is time to think about steering. Most new parachutes on the market today are steerable and they have toggles installed on each riser. To turn left, pull down on the left toggle and to turn right pull down on the right toggle. The forward speed of these round parachutes is approximately 3-5 MPH and will make a 360° turn in about 6-10 seconds.
Landing is the final act in the bailout and it is important to follow the instructions in order to avoid injury. Steer into the wind and do not attempt any turns below 100 ft. Look out towards the horizon and hold your knees and feet together tightly. Keep your knees slightly bent with your toes pointed down. Put your arms above your head holding on to the risers and as you hit the ground roll in the direction you are moving when you land.
Try to avoid all obstacles if possible. If you land in a tree or power lines throw away the ripcord. Keep your knees and feet together and get as thin as possible. Also turn your face to the side. In the event of a water landing, prepare for a regular landing except land downwind so your parachute will fall out in front of you and not on you. Unfasten the straps and swim upwind away from the parachute so as not to become entangled in the lines. If you land on the ground during high winds roll onto your back and deflate the parachute by pulling in one or two adjacent lines to spill the air. Also, take off the parachute harness and use it to cover the parachute canopy so that the canopy doesn’t re-inflate. There is a lot to remember in a bailout so it is important that you plan ahead and review your plan of action in case of an emergency.
Emergency parachute systems are highly specialized life saving devices and yours is vitally important to your air safety. Get to know your parachute system and soon you will realize what an ally that cushion can be and why you should never leave the ground without it.
Gallery